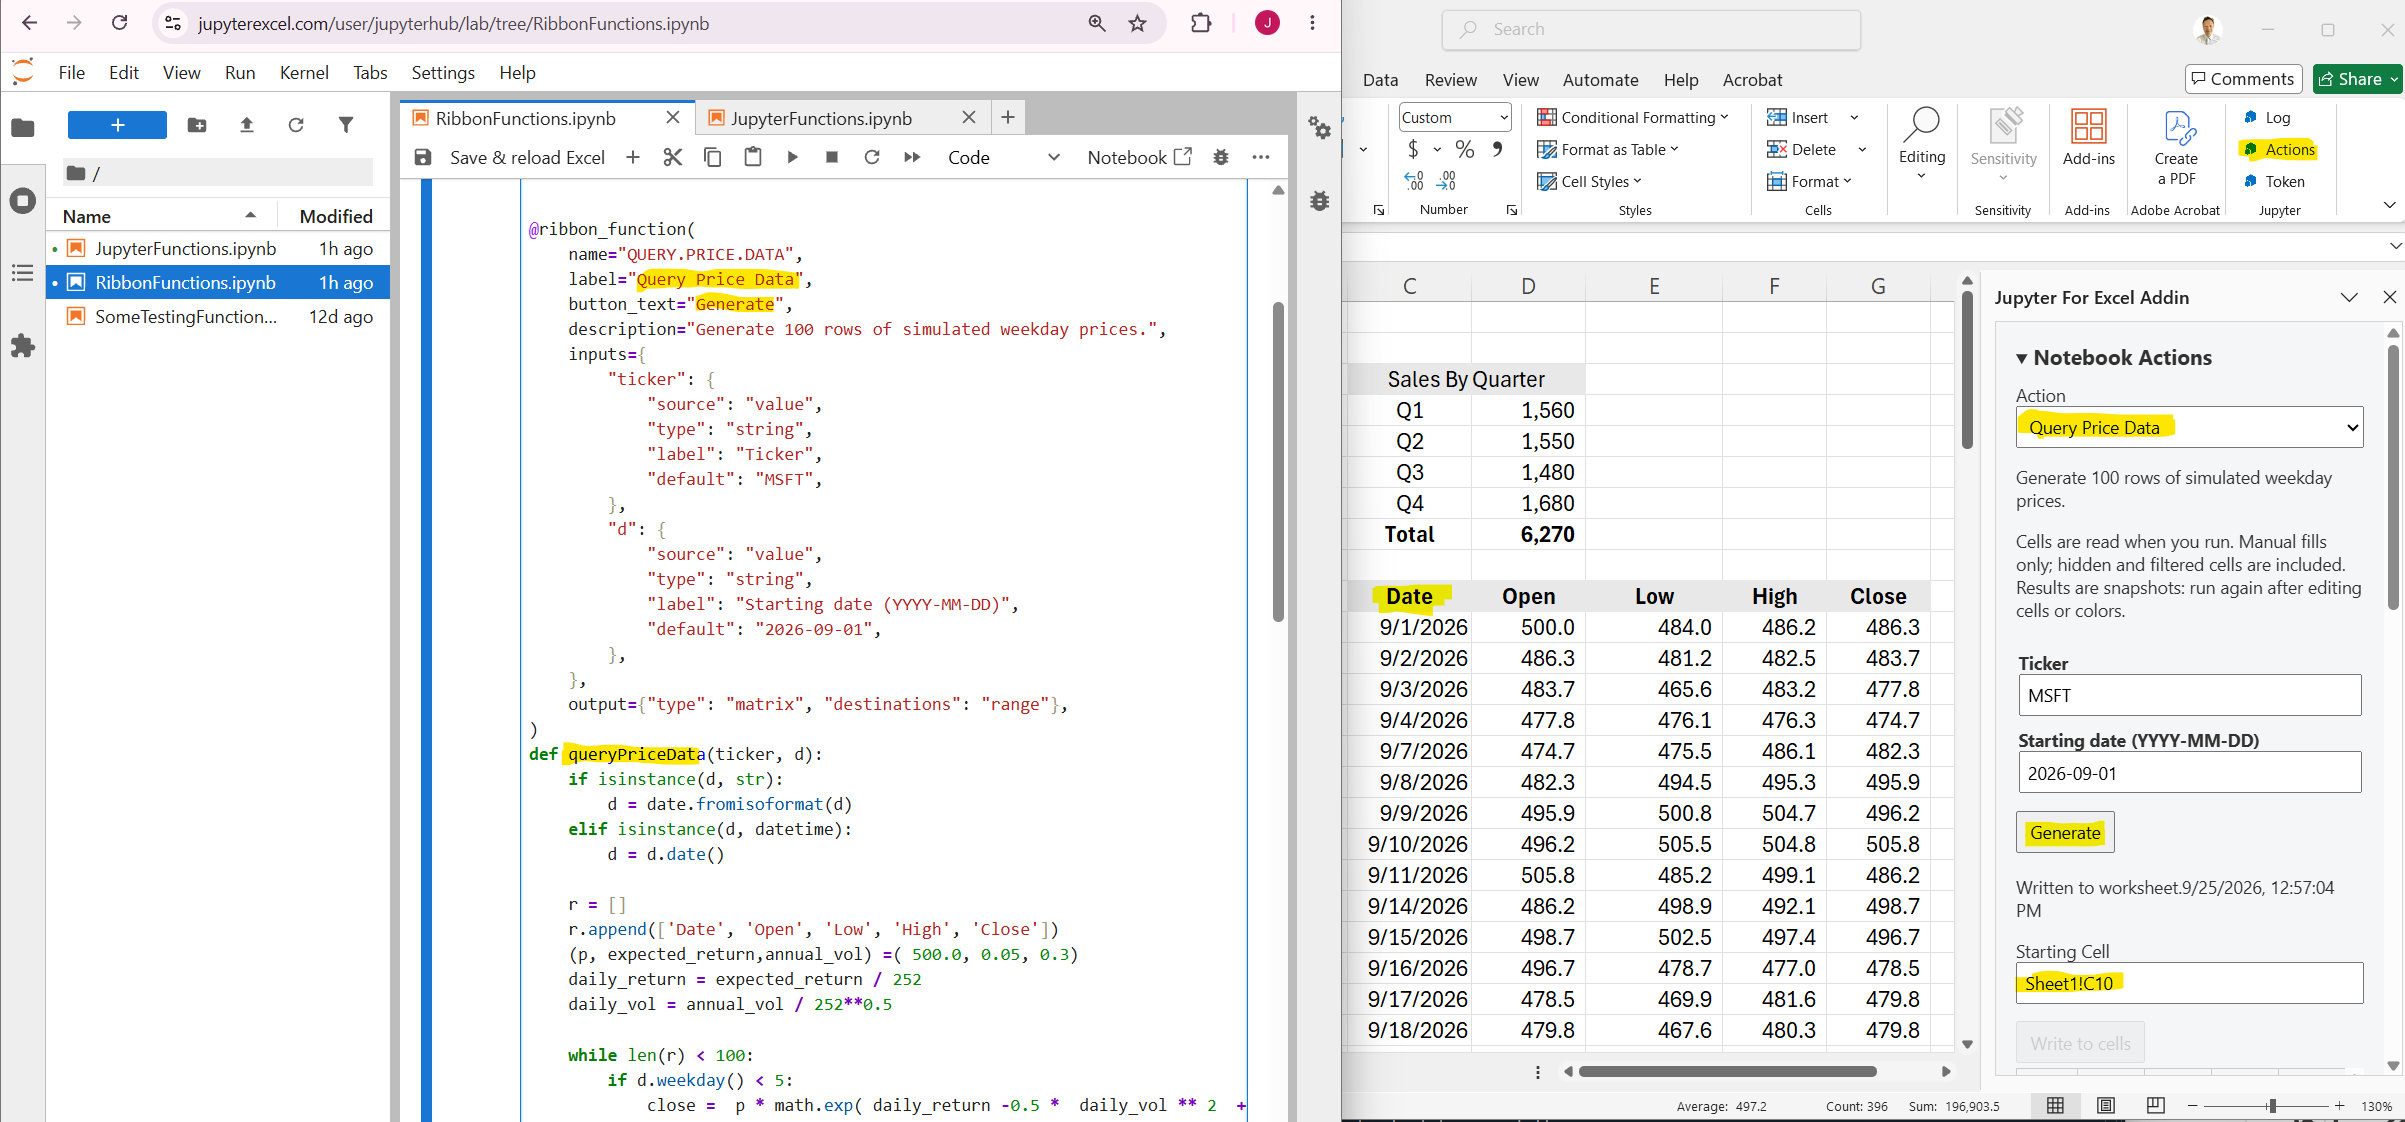
Set up the Jupyter Functions For Excel add-in in Excel
To install the server package in JupyterHub, see the JupyterExcel setup guide on GitHub
1. Install the manifest
In Excel for Windows or Excel for Mac, install the JupyterForExcel add-in from the Microsoft Store, or use the shared-folder method below. For your own custom server, add the add-in using the shared-folder method.
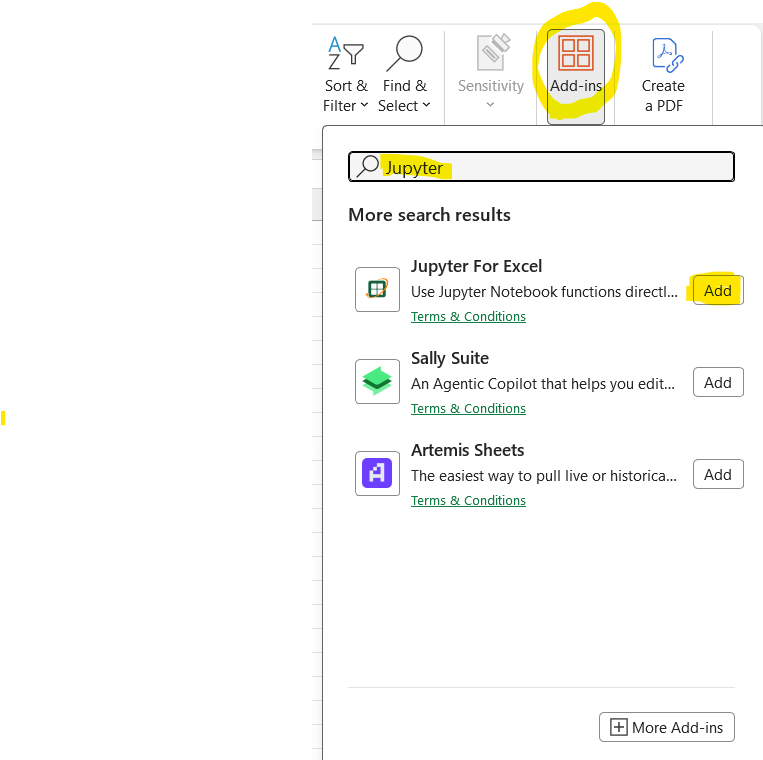
To install from the Microsoft Store, go to the Home tab on the ribbon and click Add-ins. Search for "Jupyter For Excel" and click Add to install it. See the following screenshot for reference.
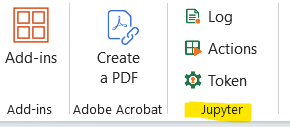
After installing the add-in from the Microsoft Store, you should see the Jupyter For Excel tab in the Excel ribbon. It has three buttons: Log, Actions, and Token, as shown below:
To install without using the Microsoft Store, use the shared-folder method described below.
Step 1.1: Prepare a folder on your network
- Any shared drive will work. If your company already has a shared drive, you can use it and skip the remaining steps in this section. Otherwise, you need to share a folder on your local computer.
- Open File Explorer and find or create the folder you want to use for your add-in manifest
.xmlfiles. - Right-click the folder and select Properties.
- Go to the Sharing tab and click Share.
- Add yourself and any required users or groups, ensuring they have Read/Write permissions, then click Share.
- Copy the full network path (UNC path, such as
\\YourMachineName\FolderName) displayed in the confirmation screen.
Step 1.2: Place your add-in manifest file in the shared folder
- Download manifest.xml from the server you are using (e.g., http://jupyterexcel.com).
- If you have your own server, download the manifest.xml. Its location is specified in the assets section of
jupyterexcel-config.json. - Place your add-in's manifest
.xmlfile inside this shared folder.
Step 1.3: Configure trusted add-in catalogs in Excel
- Open Microsoft Excel and create or open a workbook.
- Go to File and click Options.
- Select Trust Center, then click Trust Center Settings....
- Select Trusted Add-in Catalogs from the sidebar.
- In Catalog Url, paste the full network path to the shared folder. Use the path to the shared folder, not to the manifest.xml file.
- Click Add catalog.
- Check Show in Menu for the newly added catalog.
- Click OK to save, close all dialog boxes, and restart Excel.
Step 1.4: Insert your add-in
- In Excel, go to Home > Add-ins > Advanced. In versions with the older menu, use Insert > My Add-ins.
- Select the SHARED FOLDER tab at the top of the dialog box.
- Choose your add-in and click Add to load it.
Reference: Microsoft instructions for sideloading Office Add-ins on Windows from a network share.
2. Enter your access token
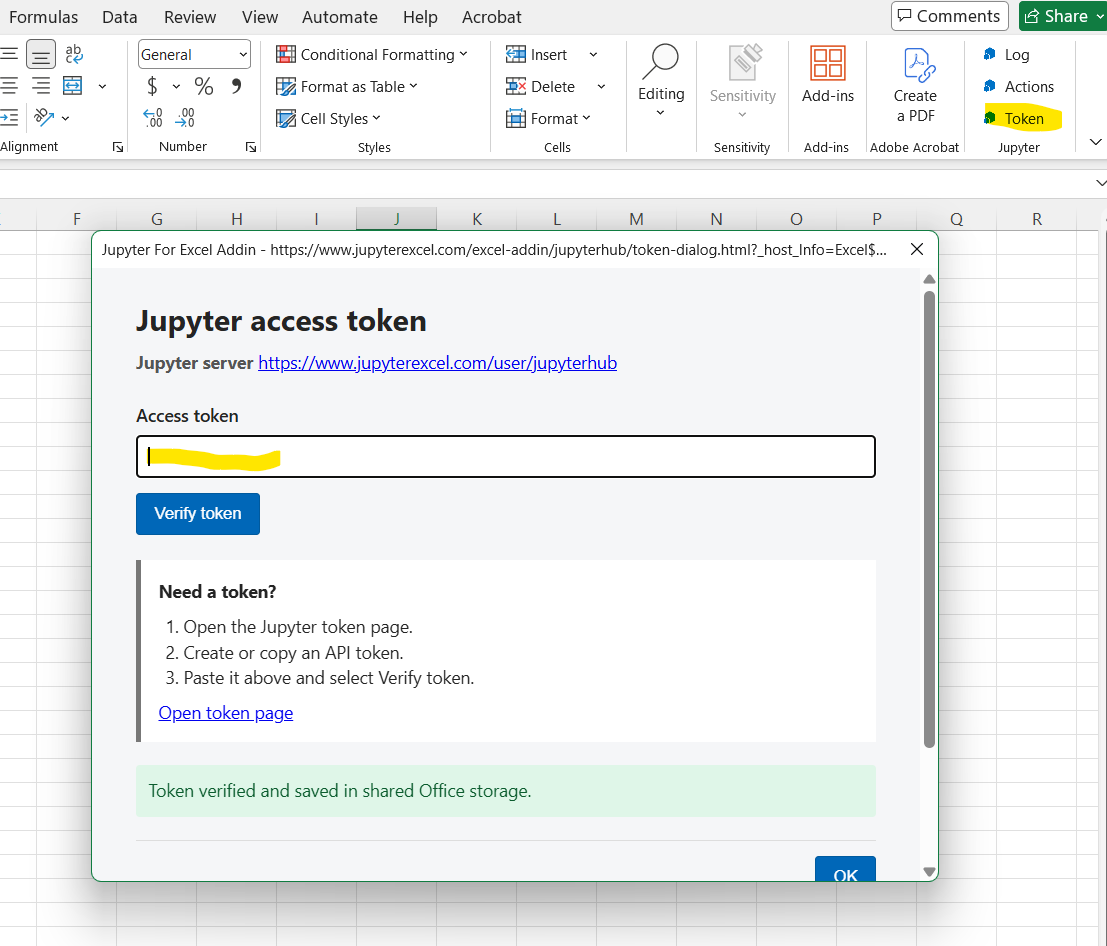
In the Home ribbon, click Input Access Token (shown as Token in the screenshot).
In the dialog box, enter your access token (for this demo project, you can use 964d7b0202104cc79782f7682b29e216), or get a new token by following the link in the dialog box or visiting https://jupyterexcel.com/hub/token. If you set up your own server on Linux, use your own server IP address or server name in the URL. If it runs on Windows, configure the token during server setup. Ask your server administrator for the token if needed.
3. Try a formula
You can add a function such as =Jupyter.Sum(1, 2, 3), or a formula similar to the following example.
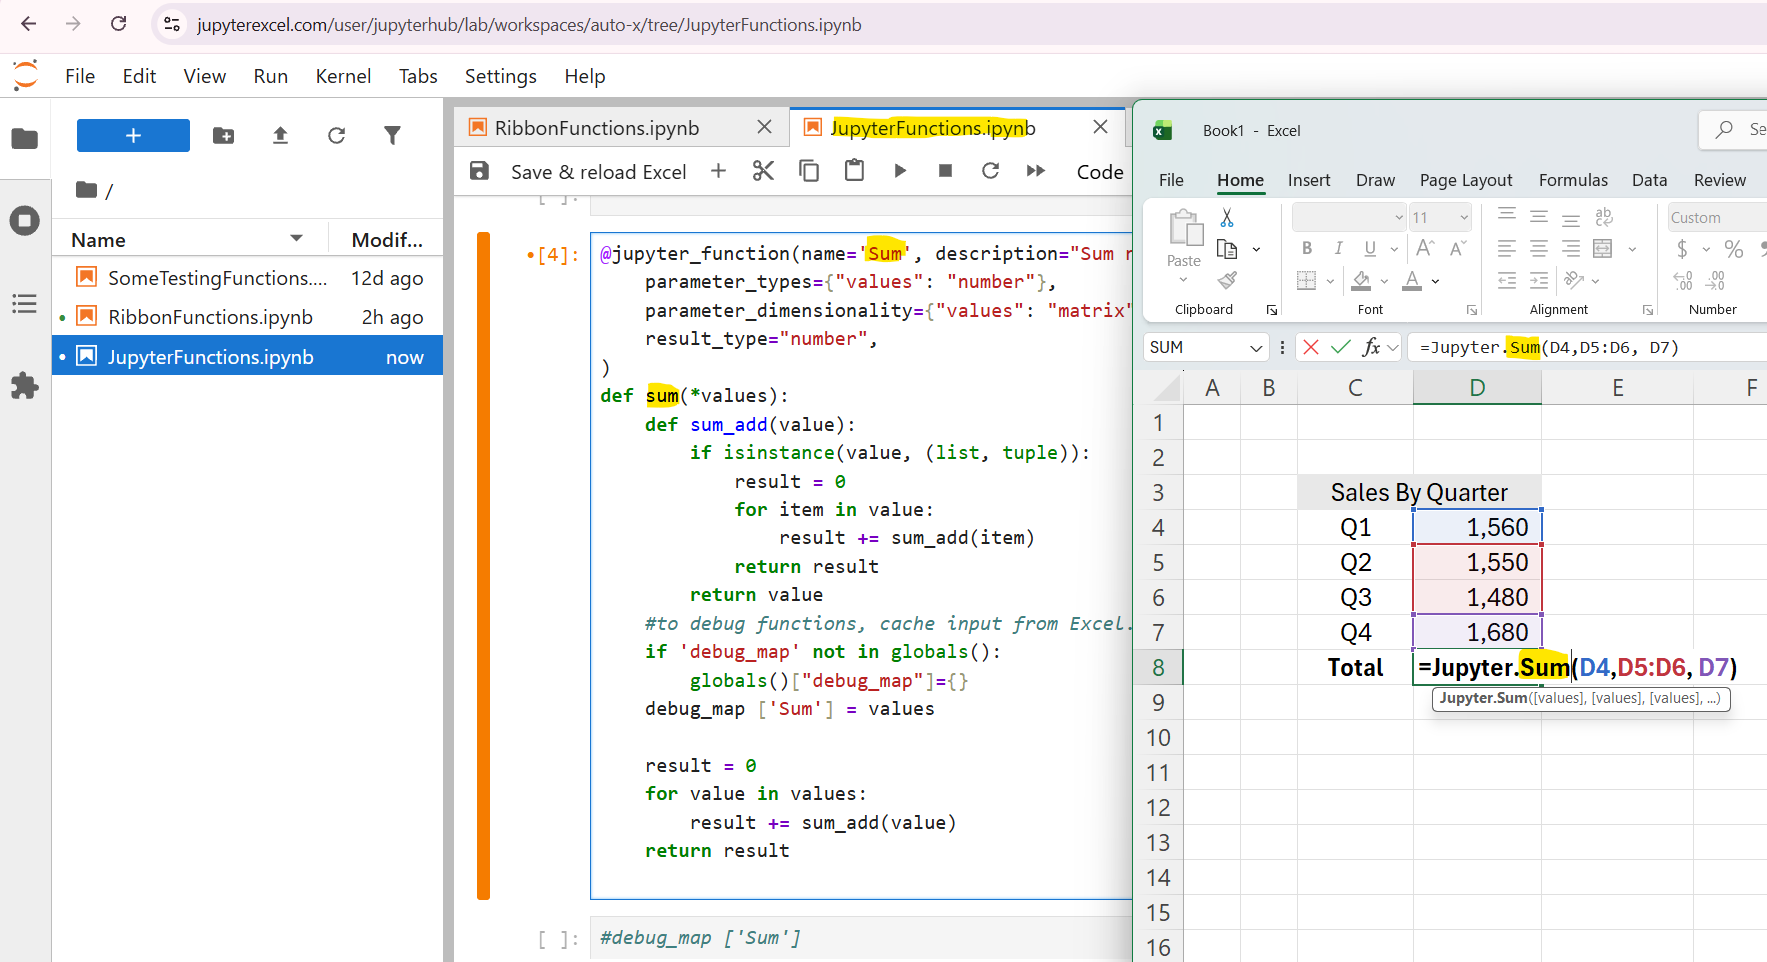
4. Add or update a function
Log in at https://www.jupyterexcel.com/. If you add a new function, the Jupyter namespace will be added automatically.
Open a notebook page, modify a function or ribbon function, and click Save the notebook.
Close Excel and reopen it. Your newly added function will be loaded into Excel.
5. Try a ribbon action
For the ribbon, you can test the Query Price Data function as shown below.